Saturday, December 25, 2010

Merry Christmas Friends!


An Irish Christmas Blessing

The light of the Christmas star to you
The warmth of home and hearth to you
The cheer and good will of friends to you
The hope of a childlike heart to you
The joy of a thousand angels to you
The love of the Son and God's peace to you
.


I pray that your holidays are joyous and filled with love! God bless!

Thursday, December 16, 2010

I Give UP. Onto Christmases Past.


What is it about this time of year? I swear I claim I do not stuff our schedule with happenings but it seems I do not have the time to continue creating anything. It's a matter of priorities. So, I'm officially giving up on the 12 Days of Ornaments. But I made it 5 days. Last year I only made it 3! Improvement! So maybe next year I'll make all my ornaments in November and save them to share.  (Of course, you know as soon as I say this, I'll be able to get in the studio every night until Christmas and create. It's Murphy's Law. We believe in that...)

So, in honor of my blatant quitting, I'm sharing a post from last year where I made ornaments. (Hopefully you won't think less of me for re-blogging, and lump me in with your feelings toward re-gifters. I mean well. *smile*) They were pretty, plus the post includes my daughter's famous Ginger Snap cookies. They are famous really. Everyone requests them. In fact, this year my father contacted her to make 6 dozen cookies for his cookie exchange at work and he would PAY HER. Being only 11, this was her first job and she knocked it out of the park! She was also paid by her grandma to make another 6 dozen, although we used the tried and true peanut butter w/Hershey's kisses recipe.

Oh! I forgot to mention I did create something recently. A card for my Secret Santa recipient. I hope he/she likes it! (the colors at the bottom are not really red/white/blue. They're more cranberry, cream and aqua. The do actually match the card.)


------------------------------------------------------
Here is the post from last year:


Yes, the Christmas muse is still visiting. But she is getting tired of the same hot chocolate and homemade ginger snaps I'm serving everyday so she is eager to move on to someone else's studio. Anyone willing to invite her over for a visit? She's hogging all the ginger snaps anyway. I'm partial to my dd's homemade ginger snaps (see recipe below.) *smile*


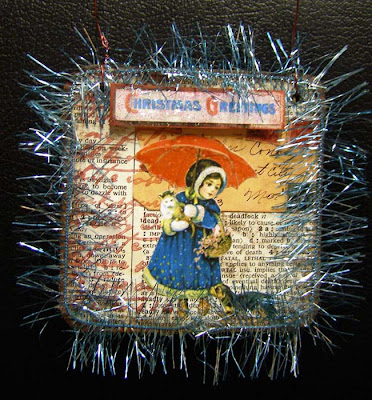
Red Lead has the most adorable Christmas collage sheets (just search by Christmas Collage.) Especially the vintage photos of children with Santa! I'm enthralled! And this trim they carry (blue trim above) is just like that sparkly icicle stuff you throw on the branches of your tree. I've been having fun playing with it!


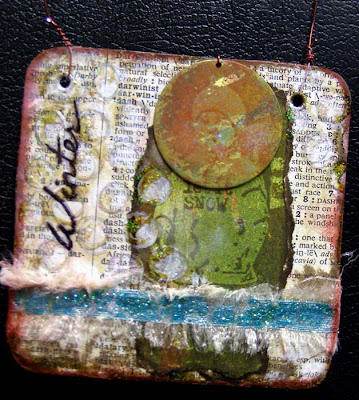
New Christmas Ornaments for my tree. Is it too early to put it up, at least in the studio (if I ever get it cleaned?!!!)

The Little One's Ginger Snaps


Ingredients:
2 1/4 cups all purpose flour
1 cup packed brown sugar
3/4 cup cooking oil or shortening
1/4 cup molasses
1/4-1/2 cup sugar (according to your sweet tooth's preference)
1 egg
1 tsp baking soda
1 tsp ground ginger

1 tsp ground cinnamon
1/2 tsp ground cloves
+ 1/4 cup sugar (for rolling)


Instructions:
Throw it all in a bowl together (except the last 1/4 cup sugar) and mix with an electric mixer. Shape into balls. Roll in the remaining sugar. Place on a greased cookie sheet. Bake in a preheated 375 degree oven for 8-10 minutes, depending on your oven (ours cooks it to perfection in 8 mins.) Cool cookies on wire rack. Arm yourself with a spatula to fend off cookie hogs, and enjoy! Makes 30-50 cookies.


Let me know if you try them, I wanna tell the little one. She loves to bake and always ruins my low carb eating when she makes these. We can't resist them!

Thursday, December 09, 2010

Let's Pretend It's Day 5 - 12 Days of Ornaments


Yeah, ummm okay. Let's just pretend today is December 5th, and I'll be sharing the 5th day of ornaments. I know its not the 5th but Sunday got away from me with church, kids portrait sitting with grandparents, little one caroling with her singing group and the teen running off to sub-work at Game Stop. Busy hectic. I found myself working on my ornament late at night, catching up on Amazing Race. At 11:45 pm I conceded that I would not get my ornament done in time to post, so I resolved to 'post it tomorrow'. Well, tomorrow turned into 2 days, then 2 days of migraines and here I sit on the 9th of December. But you don't really care, lonely blog, what day I post to you, do you? Only, that I visit and post!  So here goes.

But just to appease the blog visitors, I have a special bonus looky-loo show-in-tell for you! After the ornament... 

(P.S. This is not the original day 5 ornament. I still did not finish that one. So you're saved from handsewing skills for the moment.)

OH WAIT! Let me tell you about my evening (it has to do with the ornament.) I have a nice group of local friends who I rarely see but are still my good friends. And whenever we get together there is no awkwardness, we pick up where we left off last time we were together. What makes them so special in my heart is, they're all homeschoolers and Christian women. They were the people who helped me on this journey of homeschooling and every year, even though I've been homeschooling for 10 years now, they patiently answer all my hairbrained questions about the subject. They are a living indispensable fountain of info, that I so desperately need. They are also all artists in their own ways. And that is what makes them even more dear to my heart. 

Anyway, I planned a quick Christmas get together since I had not seen most of them in months. We met at a local restaurant and became fast friends with the perky waitress! We exchanged handmade Christmas ornaments. The one below went to my good friend Trisha. The ornament from Day 4 went to my other good friend, Rhonda (in case you cared what I was doing with my creations.)

NOEL ORNAMENT


(There are no close up step by step pics, since I was working furiously to finish this tonight before my party. It's pretty easy though.)

Supplies: 
scrap of wool
metal letters
brads
lace scrap
sequin trim
collage image (I used one from Altered Pages)
old book page
shimmery spray
gel pen
gaudy hot pink (or whatever color) plasticy leaf piece
sewing machine

This is super simple!
1 - Cut out a rectangle of wool. Could also use felt. I didn't measure but mine was a bit bigger than an ATC's 2 1/2 x3 1/2" size.
2 - Punch 2 holes in the top left and right parts to string your hanger through.
3 - Cut a 5-6" piece of sequin trim (or any ribbon will do) and thread through the holes from the back to front. I lightly glued them down on front to hold them in place for the next step.
4 - Take a piece of lace and run it through the sewing machine, gathering it like I showed you on this initial post as well as this ornament post. Easy peasy.
5 - Take gathered lace, layer over wool (hiding ends of sequin trim) and sew a zig zag all the way across.
6 - Tear a piece of the dictionary paper to fit the middle of the ornament and  spray with shimmery ink . Glue down, centered.
7 - Chose your favorite collage image and glue down in the upper center of the dictionary page.
8 - Draw around the image with a regular or gel pen.
9 - Pick out letters to spell a word (I used the letters for NOEL.) Line up where you want them to lay and put a dot through the holes at the top (if yours do not have holes, just add glue to the backs and adhere, skipping the use of the brads.)
10 - Use the brads to attach the metal letters.
11, Cut off a piece of the sparkly leaves and sew to the collage with the zig zag on the sewing machine. 

This is a great way to use up fabric scraps. If your scraps are thinner, just glue to a piece of cardboard first.


Now for the show-n-tell (all images are from Altered Pages.) I couldn't just take my ornaments to the party wrapped in anything plain. Oh no! Plus the bags I used were blue. That didn't seem very Christmasy to me. So I gussied them up. 


Three cheers for gussying! I thought they came out nicely! And just using regular ole' supplies. I did emboss the bags before making the collages for the fronts and then gluing said collages down (stamped used for embossing was from RedLeadPaperworks.com.) I think my friends liked them...


Okay, that's it for today. Cross your fingers, I get another post up tomorrow. I do have another ornament I finished waiting it the wings!

Saturday, December 04, 2010

Day 4 - 12 Days of Ornaments


How was your Saturday? Mine was surely eventful. I didn't even make it into the studio until the evening hours. But it was worth it. We went to a rescue dog viewing, 'just to look'. Yes, you guessed it. We came home with a dog. I've been wanting another one, one to play with our little Clemie. She needs a friend.  He was apparently a breeder's dog. He is shy, still learning to go the bathroom outside and takes a bit to warm up to people. I can't image the conditions he might have been kept in. His eyes were matted shut when they got him at the rescue place. His little tongue hangs out a bit because of weird teeth. We love it. 


We have this new dog 'Winston Franklin' on a trial basis to see how he fits in with our dog. He was named Frank Sinatra for his unusual blue eyes. We named him Winston because Winston Churchill's wife was Clementine (our other dog's name.) They're learning to like each other. I'm thinking they will be bffs in no time. (P.S. It's hard to take a pic of the dog, if you take too long - aka: more than 5 secs - he starts to close his eyes to sleep! lol) He's a little scruffy. You can't tell here, but he has quite a bit of tan all over his body, even some brown. So cute.  I can't wait to get him to the groomers!


After bringing home this dog, the teen and I ran off for a little shopping. We had pulled several angel tags off the Christmas tree at church (presents for kids who are in foster care) and it was time to get lots of goodies. Needless to say, I spent too much but it feels so good to think of the kids with their presents, new socks, gloves, scarves, etc... We had a good time!


Today's ornament tutorial is one I was working on the other day and abandoned for yesterday's. I finally finished it. With some of its leftovers, I made a smaller ornament that could also be a package/gift topper.

NOTE: I think everyone is busy this season. No one has had time to post ornaments. So all names that comment will go in for the drawing. No pressure. But still feel free to share your ornaments made this year in the linky thingie below. I'm giving away a whole pile of artsy things at the end of the 12 days, INCLUDING several pieces of chipboard, sequin waste, fabric scraps and more.

Supplies:
cardboard
vintage pink acrylic paint
sequin trim
chipboard star
collage image (I used an angel for an old sheet from Art By Moonlight)
glitter glue
glue
metal word
fabric and lace scraps
wire or floral wire
various beads in Christmas colors

Extras for small ornament:
Holiday Sentiment stamp
Brown Ink Pad
Sewing Machine
Sparkly Tinsely trim
Chipboard
Vertigris & Clear Embossing Powders
Embossing Ink pad

1 - Cut an ATC (artist trading card) size piece of cardboard. Pull some of the front layer off, exposing the corrugated part underneath.


2 - Paint the cardboard with pink paint and let dry.
3 - Layer the middle of the card with a few fabric and lace scraps. I went with more neutral pieces. tack down with glue or maybe a stitch with needle and thread.
4 - Cut out a collage image of an angel and glitter her wings. I also wrapped a small piece of sparkly tinsely trim for a halo. Set aside and let glitter dry.
5 - Choose a metal word. Pat with embossing ink pad and cover with clear embossing powder. Heat until it melts. Do twice, this gives it a nice shiny surface.
6 - Glue the metal word to the bottom of the ornament.
7 - Glue dot the sequin strand to the top area of the ornament.
8 - Take chipboard star and color with a red marker, including the sides. 
9 - Pat with embossing ink pad and cover in red embossing powder. Heat until melted. Repeat with clear embossing powder. Now you have a shiny star!
10 - glue down the star to the middle of the sequin trim. 
11 - Glue on the dried angel.


12 - Poke hole for the wire, twist to attach. Bead with Christmasy beads and wire other side to the ornament.
You're done!


To make the little ornament:
1 - Take scrap of cardboard, about 1 3/4" by 2 1/2". rip part of the front off. Paint with pink paint.
2 - Pick fabric and lace scraps. 
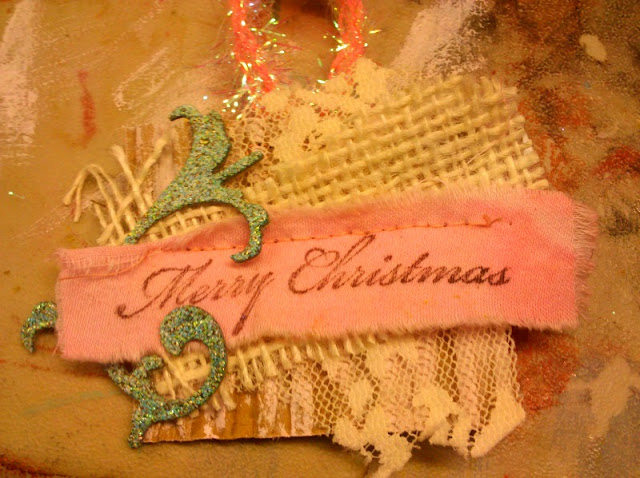
3 - With ink pad and sentiment stamp, stamp onto a brighter fabric scrap.
4 - Layer all scraps onto the cardboard and sew across the middle.
5 - Take chipboard scrolly piece and pat with embossing ink pad and cover with vertigris embossing powder. Heat until melted. Repeat with clear. 
6 - Attach to the ornament with glue dots.
7 - Cut a 3"+ piece of sparkly tinsely trim. Loop and staple to the cardboard back. 

Stay turned for tomorrow's ornament. HINT? Better brush up on your hand stitching/quilting skills. It's an easy one, if you can thread a needle.

Friday, December 03, 2010

Day 3 - 12 Days of Ornaments

Today was a busy day of who knows what going on. I feel like I did nothing but my day was full. Ever have those days? Anyway, when I finally went into my studio, the ideas were stagnant. I started and stopped 3 different ornaments until I happened upon this one that I liked making. It's a simple tutorial but I love the look of it!


NOTE: Please share your ornaments made this year in the linky thingie below. I'm giving away a whole pile of artsy things at the end of the 12 days, INCLUDING one of these vintage ashtrays so you can make your own! 

Supplies:
cardboard
collage image (I used RedLeadPaperworks.com)
Clear & Silver UTEE (Ultra Thick Embossing Enamel, thicker than Embossing powder)
Embossing clear pad
Wire or floral wire
Beads
streamers
sewing machine
jingle bell
various beads
sprig of a wired berry floral accent
glue and/or glue gun
Heat gun


1 - First, I chose an image, cut it out and glued to a piece of cardstock (MAKE SURE the north end of the picture is on the end where you can see the corrugated holes of the cardboard. You're going to need a vertical hole through the corrugated layer, for later.) Then I cut it out with scissors.


2 - Pat the whole picture with embossing ink pad. Cover the picture in Clear UTEE. Heat with heat gun. Repeat. this gives it a nice thick glassy look.


3 - Take Embossing ink pad and pat just around the front edges of the picture. Cover with silver UTEE. I tapped off the excess, then ran my finger over the middle of the pic to make sure the silver was moved back and wouldn't melt over the picture.


4 - Melt the UTEE with the heat gun. I gave it a bit of extra melting which made the silver kind of meld with the clear, making it look old. Love that look! Can't you just see jewelry like this?!


5 - Wire a jingle bell to a piece of wire or floral wire. Run the wire up through the middle of the card corrugated layer to the top.


6 - Add beads to your wire until you have enough for a hanging loop. Finish off the wire by twisting below the first bead, by the cardboard.
7 - Take the streamers and ruffle sew it on the sewing machine. You can see instructions I shared a few months ago using cheesecloth. Similar result.
8 - Gather a small piece of the sewn streamers and glue or tape behind the bell on the ornament.
9 - Bend the sprig of berry floral piece around the corner of the ornament. I meant to glue it down with hot glue before taking the picture, but the teen has run off with my glue gun. Just glue in the right corner, and on the left corner to hold the sprig down.

NOTE: I think I'll go back and add glue to the edge of the streamer, and glitter it up!


There you have it. My simple little ornament. I was happy to start using my embossing powders again. They were getting down right lonely sitting on the shelf. Okay, time to prop up the footies in front of the fire. See you tomorrow!

You're turn to show off your ornaments!

Thursday, December 02, 2010

Day 2 - 12 Days of Ornaments


Today's ornament tutorial was an unusual one. I have these vintage silver plated ashtrays. I bought them to see if I could sell them on Ebay but I found they don't sell for much. So they've been sitting around in my art room with the idea that I would use them to separate beads or something. Yeah, uh no. They've been sitting there for two years. So when I was working on ornaments, the stack of them were in the way of my feathers box and all of the sudden I had an idea for an ornament! I hope you like it!

NOTE: Please share your ornaments made this year in the linky thingie below. I'm giving away a whole pile of artsy things at the end of the 12 days, INCLUDING one of these vintage ashtrays so you can make your own!

Supplies (for blue ornament):
clear ashtrays or finger bowls would work
embossing pad & powder in silver, red and shimmery clear
heat gun
glue
paper scraps
glitter
brown ink pad
Merry Christmas (or other saying) stamp
various little things, broken ornaments, deers, whatever you like
collage images (mine are by RedLeadPaperworks.com)
sparkly tinsel trim
vintage pearls strand (mine are a light pink)


1 - Take the ashtray and pat with the embossing pad on the lip of the ashtray. Pour bright silver embossing powder all over it and then emboss with heat gun (I know, shouldn't mess up a vintage piece this way but...) For the other two trays, one I used red and shimmery clear and the pearl ashtray I didn't mess with the lip at all.


2 - Trace around the bottom of the ashtray onto a scrap patterned paper.You might need to trim the circle of paper down until it fits. For the blue one I used a painted/stamped piece of scrap paper. Glue into the bottom of the ashtray.


3 - With the shimmery tinsely trim, fit it into the inside edge of the ashtray. Mine had wire in it so I just measured, added an inch and twisted it together. Slip it inside the edge. Mine was tight enough I didn't need to glue it in but you could. The pearl ashtray, I glue dotted the pearls in, so they'd stay in place.
4 - Choose a person image and glue onto the background, not completely centered. I just love the children's sheet from RedLeadPaperworks.com.
5 - Take a deer or other animal. Add glue dots to the backside and bottom of  its feet and slip into the ashtray.
6 - Take glue and add dots of glue around the edge of the ashtray. Sprinkle with glitter and let dry.

7 - While that's drying, we'll do the sentiment. Stamp a holiday saying/word on scrap paper. Ink the edges of the piece of paper and cut a triangle at each end to create a banner. Bend it into a bannery wiggley shape.


8 - Pat the whole banner with the embossing pad while trying not to take the shape out of it too much. Cover liberally with clear embossing powder. Emboss. Do it all again.
9 - Glue dot the banner to the ashtray.
10 - Add any extras you want. On the drummer boy red one I went back and glittered the deer in the background after I took the pic. Add personal touches. Could add a person's name.


One thing I will say about using an ashtray... most will have a real silver edge you will be able to dremel drill a hole through to put a string for hanging. AFTER I made these, I realized the glass went all the way up to the edge under the silver lip. I don't have a glass drill bit yet so I couldn't finish these with ribbon. Not until I get to the store to buy it. Make sure to  use a strong ribbon to hang them with since they will be a bit heavy.

P.S. I was going to head out to the thrift store and see what other 'ashtrays' or interesting things they have to create with and take pretty pics for you to get ideas, but no. Here I sit still in my PJs in front of a roaring fire. Too lazy.  But you get the idea. You can think of other applications for this type of project. Shallow wooden bowl, juice can lids, silver cupcake papers (yes, I have some of those somewhere, fess up, you probably do too.)

Add a link to your ornaments here!

Had To Share!

Okay, probably didn't need to share, but I was slightly excited so I thought I must. 


A couple of my cards were published in the upcoming Winter issue of Somerset Studio Gallery. This is my first time being in a Somerset/Stampington publication. I guess it pays to actually submit stuff. It's the first time I've sent in items for consideration. 

Remember this post and these items? 


 A few items from that pile made it in.


Mine are on the left.


All images and green vine trim are by RedLeadPaperworks.com. My favorite part was the angel stamp. I usually put down a scrap paper to do all my painting on and then when I'm done I have this paper full of many colors.  This one was too pretty to just toss so I stamped on it. Isn't it pretty? I just need to remember when I'm painting, not to do my gluing on the same paper, otherwise I can't use it as background. It gets all gummy.The bottom right blue/green part on the 'Sing' card is also scraps painted with leftover paint. 

The eggs on the top one were cut out of purpley marbley vellum I was just going to toss or give away (not a fan of the purple, people.)


Anyway, just had to share.

* STAY TUNED: Day 2 of Ornaments is coming up. Don't forget to show off your ornaments to enter to win a pile-o-goodies.

Wednesday, December 01, 2010

DAY 1 - 12 Days of Ornaments

Well, November was a busy one! I did meet my goal of 50,000 words for NaNoWrimo though. I was so surprised. I actually finished about 5 minutes before midnight on November 30th. Talk about cutting it close! I guess I could have cheated but where is the fun in that?! I will continue to work on the book throughout the year and we'll see what happens after that.


So, I'm back into full art mode again. Today it felt so good to step into the art studio and create something, ANYTHING! I need ornaments for several friends and a Secret Gypsy package so that is what has been on the agenda today. While I'm  at it, I thought I'd do a little round of 12 Days of Ornaments. For the next 12 days I'll be sharing the ornaments I make that day, along with step by step instructions. If you have nothing else you're working on right now, feel free to play along! 

NOTE: There is a link thingie at the bottom for you to share your creations.  For every ornament you make and post to my linky thing, your name will be entered in a drawing. At the end of 12 days, I'll draw a name and send a whole envelope of supplies to make Christmas ornaments (including the blue sparkly wreath made below.) It will be lots of fun stuff, scraps, ribbons, german scrap, sparkly stuff, yummy goodies!

Today's ornament tutorial was a fun one and pretty quick. So quick I forgot to take step by step pics. I'll try to recreate there here.

Supplies:
cardstock scrap (about 2 1/2 x 5 1/2 or a 3X5 index card would do just as well)
scraps of fabric, ribbon, lace, trim, seam binding, snap strips, etc...
sparkly tinsel garland or something similar
thin sparkly thread (i used silver)
grommets (eyelets) and setter
floral wire (or any wire, mine is green)
brown ink pad
star stamp (or similar small Christmasy stamp)
patterned paper scrap
Christmas image (I used an Angel from RedLeadPaperworks.com)
sewing machine
needle and thread


1 - Cover cardstock in a think piece of fabric, I used a couple pieces of leftover eyelet fabric. Not a bit deal. It just gives structure and you don't really see it. Use up that ugly fabric you hate. SEW it to the cardstock around the edge.


2 - Line up scraps of fabric, ribbon, lace, trim, etc... until you like it on the tag. I overlapped mine except for two pieces I put on top of everything else so they would essentially make a 'pocket' for my card. SEW all of them down, careful to keep the scraps tight and straight as you go around. If you're worried about it, give them slight dots of glue or glue dots to stay in place while you sew.
3 - Trim the fabrics, laces, etc.. until you like the edging. Mine hangs over the edge of the tag about 1/3" on all sides. Yes, it's going to be a big ornament. Might use it for a doorknob decoration instead. *smile*


4 - take sparkly tinsely trim and coil in a wreath shape. I went around twice, twisting it to be more firm.


5 - Tie a bow with the sparkly thread stuff (yes, I'm real descriptive tonight.) on the wreath.
6 - Set eyelets in the top left and right corners of the ornament.
7 - Twist wire into eyelets. I tied on one side, coiled the wire around my finger to get that nice spiraly look, then wired it through the other eyelet.  No right or wrong here.
8 - Center the wreath between the two eyelets. Hold in place while you stitch down the wreath with needle and thread. This is where you'll probably want thread that matches your sparkly tinsely trim. I used a maroon.


9 - Cut out your image. Glue to a piece of patterned paper scrap.
10 - Cut scrap in a rectangle around the image (you'll want to make sure its small enough to slip in behind the ribbon/strips you sewed on top of the rest as a 'pocket'.
11 - Ink the edges of the scrap. Stamp stars or other small Christmasy stamp around image on scrap.
12 - Slip into 'pocket' and if you're worried about it falling out, add a few glue dots under the backside.

NOTE: I did stamp Merry Christmas on one of my seam binding scraps after I sewed it on there. You can do that or add a piece of paper with a sentiment.


You're done! Now, wasn't that fun?! Come back tomorrow for more fun ornaments to create.

Sunday, October 31, 2010

November Projects

Just a real quick post. It's Halloween evening and I'm all tuckered out. I succumbed to 3, no, 4 counting the lollipop with the gum inside, candies tonight. I tried, I really tried to be good. How many did you eat?! lol

Our fall is now surrounding us. The chilly air is settling in and I'm always wanting a roaring fire in the fireplace. I'm going into hermit mode. However, I have two projects in November that will keep me busy and surprisingly out of the house. So much for staying inside my comfort zone.


The first is this: National Novel Writing Month. Yes the written insanity has taken hold of me, mostly for the actual accomplishment of completing 50,000 words in one month. They have said we can not write one word over and over so my original plan has been snafu'd. So now I've had to think up an actual plot with characters, settings and the like. Let me tell you, I've gone through three plot scenarios already. And now with the first day of writing looming over my head in a little over an hour, I think my brain is moving onto an as yet unformed NEW plot. Ahhh, gotta love the mind and its creative twists and turns. No easy road for me, I guess. We have a local NaNoWriMo chapter that will be gathering for weekly Write-Ins, so I guess I'll be leaving the house for those. Are you participating in NaNoWriMo this year?


I saw a twitter this evening from 26Things about their new November challenge. I'm thinking I will participate in this as well. My camera, my lovely new Christmas present camera, has been sorely neglected the last couple of months and it's time I pulled it out and started snapping. I'm thinking I might invite the kids to join me in this challenge as well! 

So that's a quick update on what's going on around here. As to art, I have several canvases half finished, one is only waiting for that certain special piece I can't seem to fathom at this moment, and then it will be done. The art room is in disarray again but what is new? I'm not working on any altered books at the moment but do have a project for Altered Pages in the works as well as a couple for Red Lead ruminating in my brain. It's going to be a busy (hopefully successful) November, I can tell.

What's up with you in your world?

Monday, October 25, 2010

Art Lessons

Once upon a time there was a mom. Okay, an artistic mom, who had trouble teaching art to her child. I know, CRAZY!! you say. Yes, definitely. The mom would take the artsy child to the art room but then not know what to teach.


'Okay, um, how about we play with some paper? Or stamps?'
'Mom, we did that last time... and the time before that!'
'Ummm, what about making a book, I can show you how to sew a journal.'
'Nah, doesn't sound fun.'
'How about drawing a picture?'
'Umm, I don't know what to draw.'
'Okayy, wanna sew something?'
'What should I sew?'
'I don't know.'


See? I'm not good at teaching. I have this weird picture in my head of her just walking into my art room, grabbing this and that and magically creating something she likes. This doesn't happen often. It helps if I plan something out first and as we get going it morphs into something else, that's okay.


I have grandiose plans of teaching her about other artists, and their styles of art. This involves planning too. Because to be perfectly frank, I am embarrassed to say I don't know much about any artists. I'd love to learn about them too.  What makes this even worse is that we homeschool


Well, not that part but we do good amounts of school Monday -Thursday so we can have Fridays off for Art, Math/English games or field trips. I'd like to see us get to the end of our school year and she be well informed about all types of arts and artists.


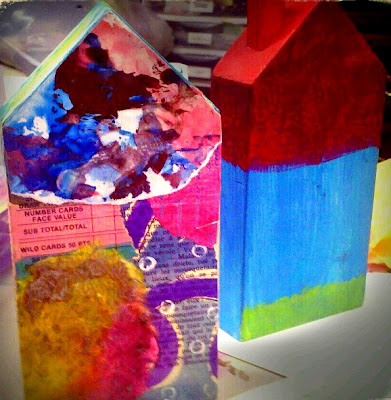
This past Friday we did manage to create. I pulled out a bag of wooden house shapes I picked up at a garage sale and we both created one. She preferred to paint more of hers (SEEN UP ABOVE), with some collage of a roof on top. She made it as a birthday gift for her sister so she wanted to add a picture of herself in the door. I thought it was cute!


Mine includes plastic fencing, a fabric heart, pompoms and furniture tacks. I used all handmade, handpainted and textured papers. We had a pretty good time, despite my non-planning but it was touch and go in the beginning. We almost quit due to lack of plan...


At the end of our creating session we painted off the rest of the paints puddles we had out, on papers for future use (I have a thing about wasting paint! lol)


Cross your fingers I come up with ideas by next Friday. Any suggestions?